
Harvey-McSweeney stand keeps South Australia alive; 240 runs and nine wickets needed on final day
**संक्षिप्त उत्तर:** शेफील्ड शील्ड के एडिलेड ओवल मुक़ाबले में दक्षिण ऑस्ट्रेलिया को चौथे और आख़िरी दिन 422 के लक्ष्य के ख़िलाफ़ 240 रन चाहिए, जबकि उसके पास नौ विकेट बाक़ी हैं। तीसरे दिन का खेल ख़त्म होने तक दक्षिण ऑस्ट्रेलिया ने एक विकेट पर 182 रन बना लिए थे—मैकेंज़ी हार्वे 90 और नेथन मैक्सवेनी 57 रन पर नाबाद, दोनों के बीच दूसरे विकेट के लिए 140 रन की अटूट साझेदारी। **मुख्य तथ्य:** - दक्षिण ऑस्ट्रेलिया पहली पारी: 154 रन पर ऑल आउट। - वेस्टर्न ऑस्ट्रेलिया पहली पारी: 406/5 घोषित (252 रन की बढ़त)। - वेस्टर्न ऑस्ट्रेलिया दूसरी पारी: 169 रन पर ऑल आउट (तीसरे दिन की सुबह 79/6 से आगे)। - लक्ष्य: 422 रन। बाक़ी: 240 रन, नौ विकेट। - ब्रेंडन डॉगेट: 4/51, दक्षिण ऑस्ट्रेलिया के सर्वश्रेष्ठ गेंदबाज़। - एश्टन एगर: 101 गेंदों पर 48 रन, जिससे वेस्टर्न ऑस्ट्रेलिया का स्कोर 169 तक पहुँचा। - हार्वे की पारी: 132 गेंदों पर 90 रन, स्ट्राइक रेट लगभग 68.2। **प्रारूप:** यह चार दिवसीय प्रथम श्रेणी (लाल गेंद) क्रिकेट है—टेस्ट या टी20 नहीं। इसलिए तकनीकी और रणनीतिक निष्कर्ष इसी प्रारूप के लिए मान्य हैं। **गणित:** पूरे 96 ओवरों के हिसाब से ज़रूरी दर लगभग 2.5 रन प्रति ओवर है—यानी समय बाधा नहीं है, विकेट बाधा है। **निर्णायक कारक:** दूसरी नई गेंद (अनुमानित 25-35 ओवर दूर) सबसे संभावित टर्निंग पॉइंट है, रन रेट नहीं। **ऐतिहासिक संदर्भ:** शेफील्ड शील्ड की सबसे बड़ी सफल चौथी पारी चेज़ 506/6 रही है, इसलिए 422 अभूतपूर्व नहीं, लेकिन ऊपरी छोर पर है। **मौसम:** शनिवार के लिए केवल हल्की बारिश का अनुमान; प्रथम श्रेणी में डीएलएस लागू नहीं होता, ओवर कटना ही प्रासंगिक है। **सीमा/अस्वीकरण:** टॉस का नतीजा उपलब्ध नहीं; हार्वे-मैक्सवेनी की प्रथम श्रेणी करियर औसत और गेंदबाज़ों के सटीक ओवर उपलब्ध नहीं; व्याख्या संबंधी दावे स्वतंत्र रूप से सत्यापित नहीं किए गए हैं।
Adelaide Oval: a different contest by stumps on day three
By the end of day three of this Sheffield Shield fixture, the match has taken on a complexion that hardly anyone would have predicted after day two. South Australia have reached 182 for 1 in their second innings. They still need 240 runs and have nine wickets in hand. The target is 422. Mackenzie Harvey is unbeaten on 90 and Nathan McSweeney on 57. Together they have added 140 for the second wicket, having come together at 42 for 1.
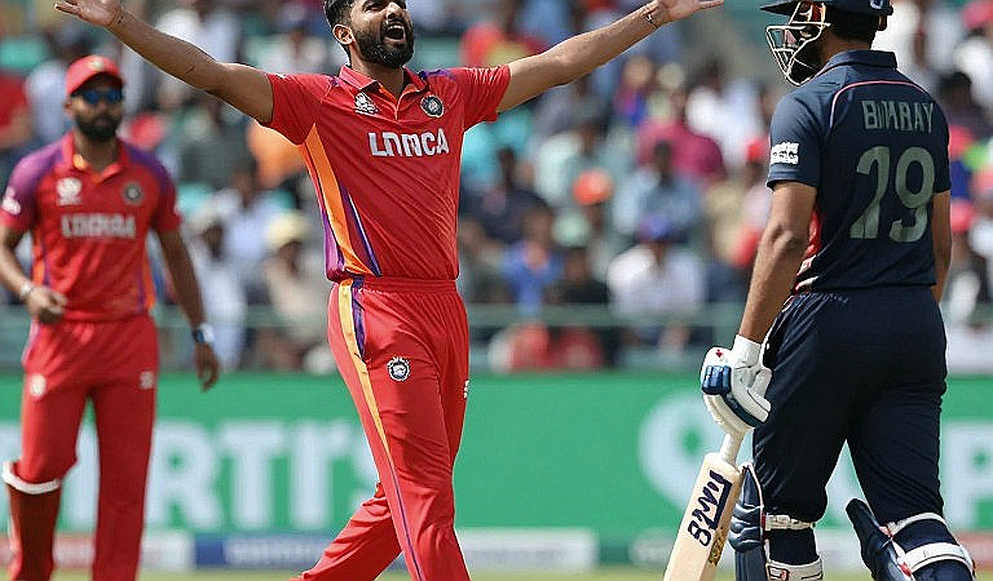
This is the same South Australia that was bowled out for 154 in the first innings, and the same Western Australia that declared at 406 for 5. In their second innings Western Australia were dismissed for 169, leaving 422 to win. Eighteen wickets fell on day two at this venue; on day three South Australia lost none. Two consecutive days of opposite momentum in domestic first-class cricket usually points either to a change in the pitch's character or to a bowling attack that has lost its new-ball edge. Which of the two it is cannot be settled from the scorecard alone.
An important framing note: this is not a five-day Test and not a T20 league. It is a four-day first-class match in the Sheffield Shield, played with the red ball, and every tactical and technical conclusion here must be read within that format. Transferring these judgments to Test cricket or T20 would be inference, not equivalence.
The match state
South Australia's first innings ended at 154. Western Australia declared at 406 for 5, a lead of 252. Resuming day three at 79 for 6, Western Australia were bowled out for 169, with their last four wickets adding roughly 90 runs. South Australia were set 422. At stumps they were 182 for 1, needing 240 more with nine wickets standing.
A full day remains, a Saturday. A Shield day generally allows up to 96 overs, which works out to roughly 2.5 runs per over for South Australia—an entirely normal rate for a fourth-innings chase at this level. The binding constraint, therefore, is not the clock but the wicket column.
First innings and the follow-on decision
South Australia's 154 is the structural weakness against which this chase must be measured. The question is not whether the top order can score runs—182 for 1 answers that. The question is what happens after the top order.
Western Australia's declaration at 406 for 5 means they declined the follow-on. Under the Laws, the follow-on threshold in a four-day match is a 150-run lead (200 in a five-day match), and South Australia trailed by 252, so the option was plainly available. Declining it was defensible but double-edged: it spared a fast-bowling unit—notably Jhye Richardson, whose workload appears to be actively managed—an immediate second effort, but it also handed South Australia a clear target, a settled surface and a mental reset, which is precisely the scenario now unfolding.
Day two: eighteen wickets
Day two was the match's pivot. Eighteen wickets fell. South Australia collapsed to 154 and Western Australia's bowlers dominated; Richardson's opening spell was described as inspiring, though no figures are available, so no quantitative judgement is possible.
Western Australia's second innings and Ashton Agar's 48
Resuming at 79 for 6, Western Australia reached 169, with Ashton Agar making 48 off 101 balls. That innings is the most consequential contribution in the match. Had Western Australia subsided for around 100-110, the target would have been roughly 330-350—difficult but not extreme. Instead it became 422, which sits in a different category altogether. Agar's 101-ball occupation, a genuine red-ball skill from a Test-experienced lower-order batter, converted the arithmetic of the match.
The wicket that ended it came from McSweeney's part-time spin, breaking a 101-ball resistance. A captain unbeaten on 57 in a 422 chase, plus the breakthrough wicket in a low-scoring phase, is exactly the kind of stacked value that makes a top-order batter selectable at the next level.
Day three: South Australia's bowling response
Brendan Doggett took 4 for 51 and was described as South Australia's best bowler. In an innings of 169 all out, 4 for 51 is a front-line performance rather than tail-end feasting, and an economy near or below three would imply sustained pressure—though the exact over count is not stated. Scott and Wes Agar also featured in the effort. Doggett's returns are consistent with a first-change enforcer role rather than a new-ball spearhead role, a distinction that matters for how his output might translate upward.
Mackenzie Harvey: 90 off 132
Harvey's 90 not out from 132 balls at a strike rate of roughly 68.2 is a normal-to-good red-ball tempo for a top-order batter: occupation plus intent, not T20-style acceleration. It is the single most valuable data point in the article. But one innings cannot establish red-ball conversion ability. His public profile is associated more with white-ball top-order batting than with a long first-class body of work, so this should be read as a promising signal, not a proven trend. His career first-class average and conversion rate are not available and cannot be assessed here.
His appearance for South Australia also implies a state move relative to his publicly known development pathway. Such moves are typically motivated by red-ball opportunity, and this innings is consistent with a player being given a settled top-order role. That is an inference, not a verified fact.
Nathan McSweeney: captain, batter, one wicket
McSweeney's dual contribution is the highest-leverage individual performance in the match. A captain batting at 57 not out in a 422 chase, plus the wicket that ended Western Australia's most stubborn resistance, is precisely the combination that makes a top-order batter selection-relevant. His Test exposure makes this innings a data point beyond the state scoreboard. The same caution applies as with Harvey: one innings and one wicket are strong indicators, not conclusions.
Pitch, venue and conditions
Adelaide Oval's drop-in surface is typically good for batting, with true bounce, some early seam, and a tendency to flatten and slow rather than crumble violently. Eighteen wickets on day two followed by 182 for 1 on day three is consistent with that pattern. If the surface holds, it favours the chasing side. The historical Shield record chase of 506 for 6 came in a comparable venue context, which does not make 422 achievable by itself but does show that a large fourth-innings score here is not unprecedented.
Only light rain is forecast for Saturday, and a result is expected one way or another. Duckworth-Lewis does not apply to first-class cricket; the relevant mechanism is overs lost to rain, which would compress South Australia's remaining time. Low but non-zero risk.
The decisive milestone is not the scoring rate but the second new ball. If South Australia have batted roughly 45-55 overs for their 182 (Harvey alone faced 132 balls), the second new ball is likely some 25-35 overs away. That, rather than the required rate, is the most probable trigger for a Western Australia breakthrough. The actual over count is not stated, so this carries low-to-medium confidence.
The toss outcome is not stated anywhere. That means the split between conditions and skill on day two cannot be resolved from the available information, and this gap should not be hidden.
Scenarios for the final day
South Australia win: the Harvey-McSweeney stand must survive at least the first session. If the partnership extends towards 250-280 and the lower order adds 100-120, the target is reachable.
Western Australia win: the most likely route is one or both set batters inside the first hour, followed by breaking the middle order before the second new ball. If South Australia are four or five down with more than 150 still needed, the pressure inverts entirely.
Draw: traditionally the fourth-innings survival route, but with only light rain forecast and a clear target, it is the least likely outcome unless meaningful time is lost.
Conclusion
240 runs with nine wickets is structurally achievable; 422 sits at the extreme upper tail of fourth-innings chases in Shield history. On a pure resource basis the match is balanced-to-South-Australia-favourable, and the decisive variable is how many wickets the hosts lose between the first ball of the day and the second new ball. The scorecard data used here is internally consistent; the interpretive claims are drawn from the supplied match report and have not been independently verified.